Designing for Writing (Plottr then Scrivener)
- Posted: 5/14/21
- Category: Writing Tutorial
- Topics: Scrivener Seven Point System Plottr Writing Craft
Plotters versus Pantsers
Plotters plan a story’s major events, then they write using that guide. (Pantsers, on the other hand, simply jump right in to the writing and “see where it goes.”)
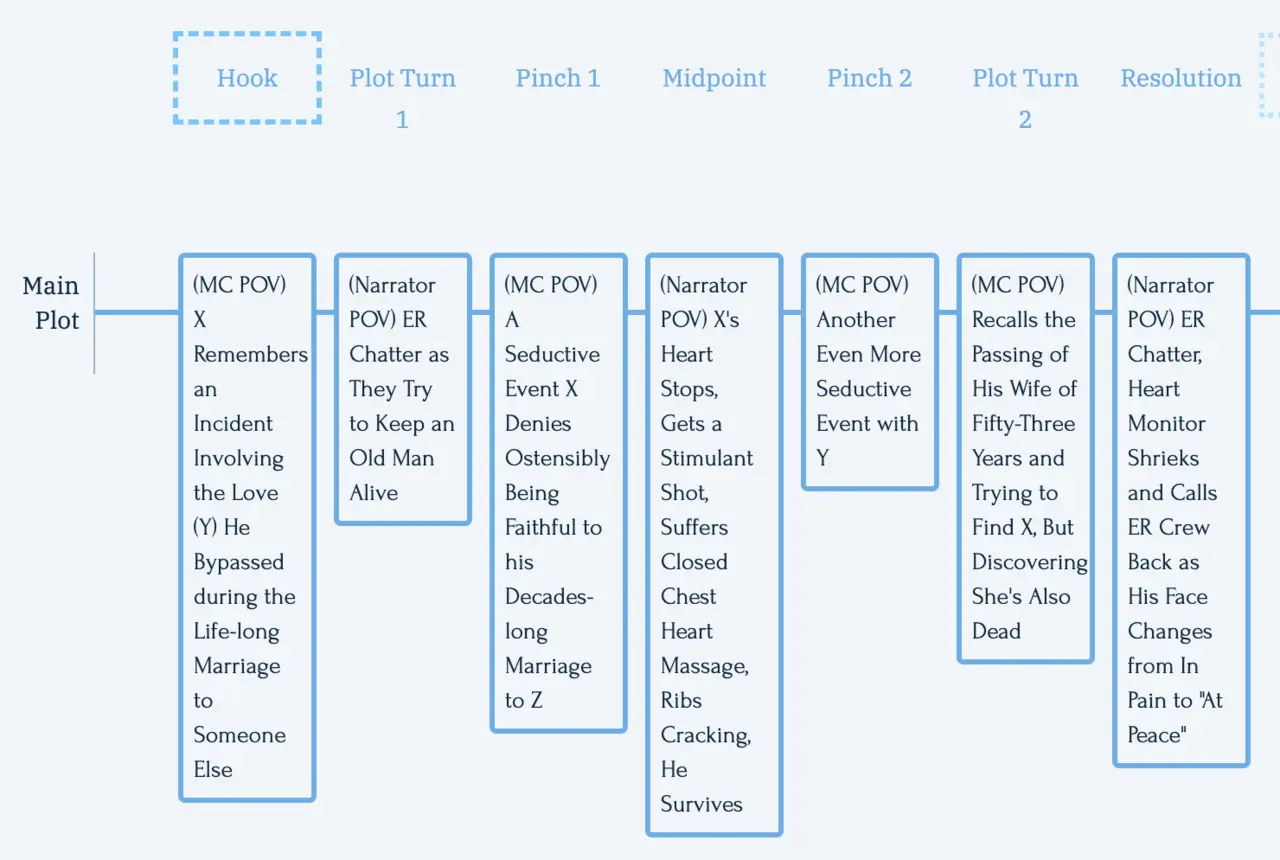
I’ve mentioned the Seven Point System in other posts.
The picture is a screen grab from a story-design tool called Plottr. It provides a nice visual representation of a story’s structure. In the above screen capture, the top row of boxes are the “points” in the Seven Point System: Hook, Plot Turn 1, Pinch 1, and so forth. And in the second row, I’ve sketched their contents into the “Main Plot” line. (“MC POV” means “Main Character’s Point of View.” In the “Narrator POV” scenes, those will be told by an outsider observing the action.)
At this point, I haven’t decided on anyone’s name so “X” is the main character, “Y” is the object of his lust, and “Z” is his wife.
I’ve found that as my story develops in Plottr I am increasingly clicking and bringing up different views, add to the notes, and the clicking back to the main picture. Eventually, Plottr’s ability to let me see the whole story at once–that’s what attracted me to Plottr in the first place–is lost: I can no longer see the forest because of all the trees I’ve planted.
It’s time to graduate to Scrivener.
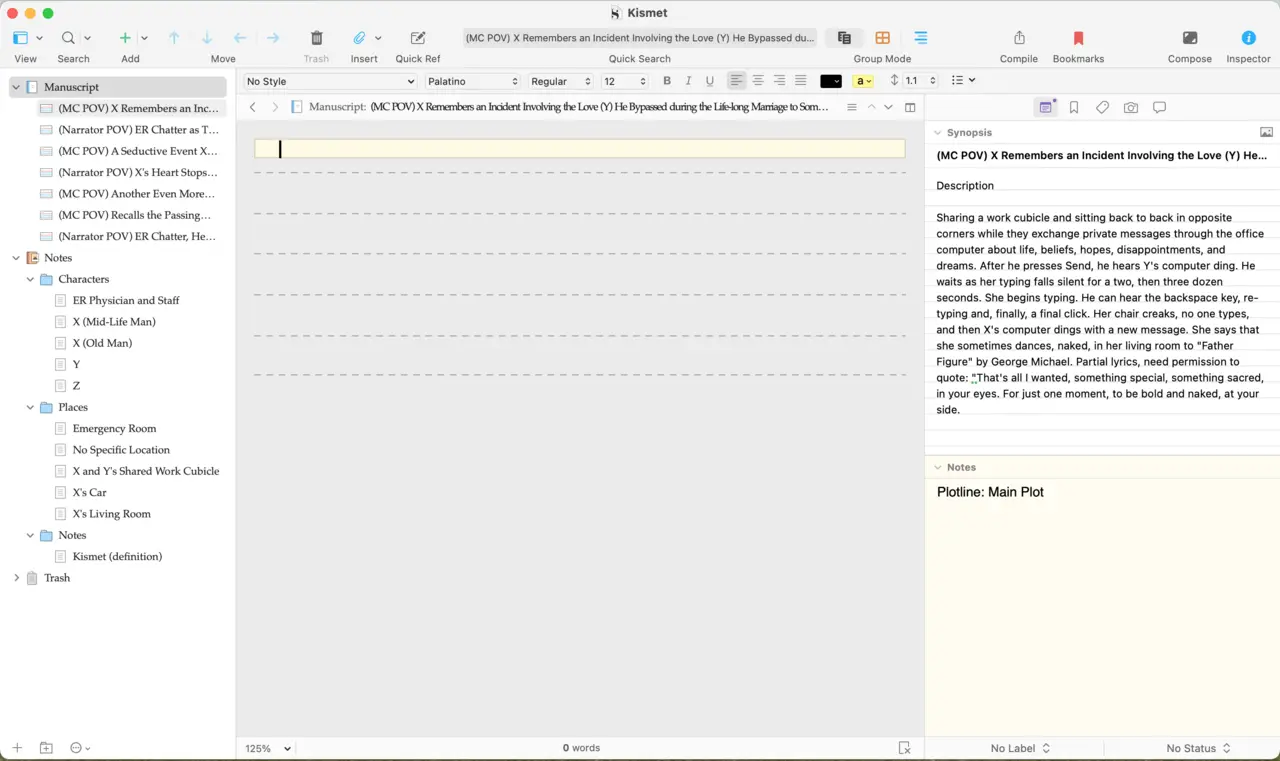
Plottr’s “export” to a Scrivener project is perfect.
And once I do that, I shift all my story-writing to that tool.
In Scrivener, the boxes in Plottr become folders (Chapters) and sections (Scenes).
For this particular story, I am now sure it will be short, a few thousand words at most. It’s definitely not a novel (typically 70,000 or more words). By convention, short stories usually don’t have chapters. Instead, they have one or more scenes, and other than a blank line, that’s the only division.
For this story, I don’t need the folders that Plottr created. So, I moved (drag-and-drop) the seven scenes in the Binder up to the top of the Manuscript folder, and then deleted their empty folders.
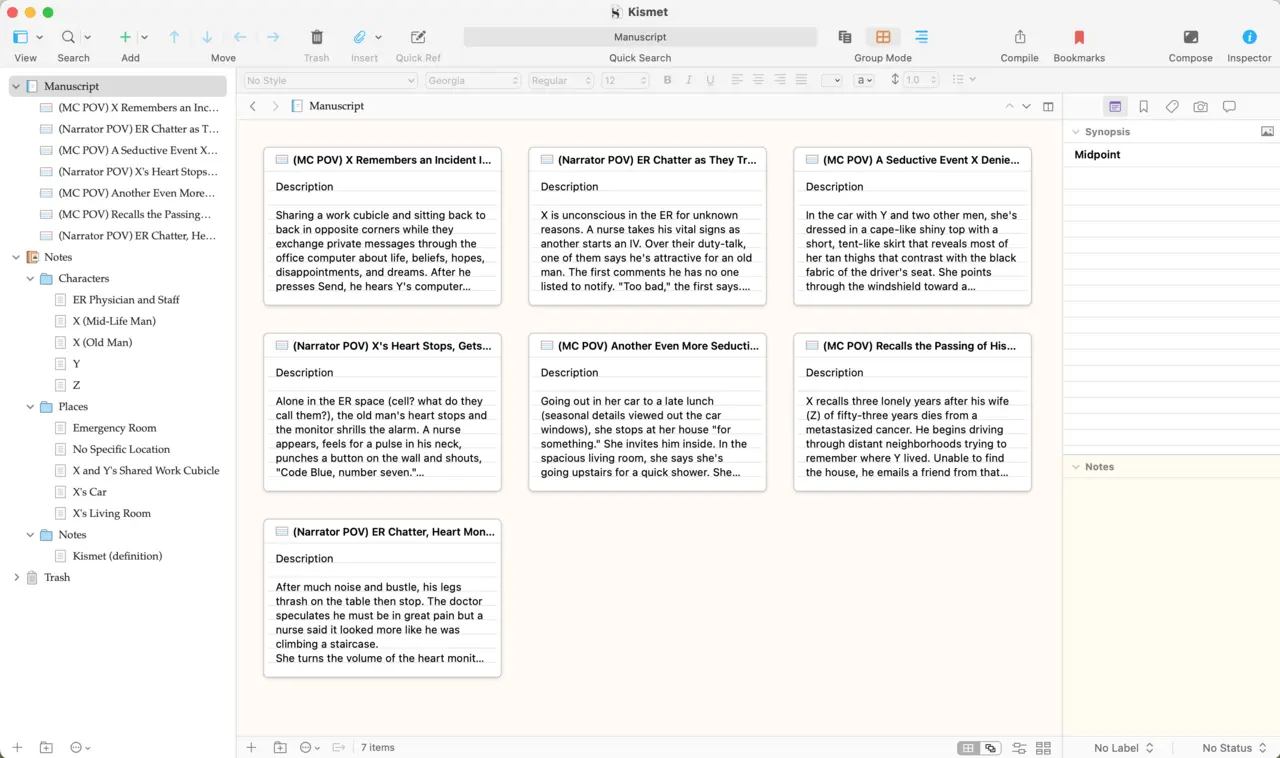
Here’s the result, first in Scrivenings mode, and then in Corkboard View.
Next, notice over in the Notes folder (middle of the Binder in the left-hand column) are folder for Character, Places, and Notes that have come across from Plottr.
Plottr’s Characters folder is redundant with one already in Scrivener.
Through this process, I’m shifting my work and my brain into Scrivener. When I think “Character,” I want to go to the Scrivener folder.
So, I will drag-and-drop what’s inside Plottr’s “Characters” folder into Scrivener’s folder of the same name, and then Trash Plottr’s (now empty) one.
Thereafter, I’ll add more detail to the characters including a picture glommed from the internet. (I don’t use the pictures for anything other than to look at while writing, so I’m not violating a copyright.)
And then I’m ready to start spewing text into Scrivener.
Important Point: Once I’ve transitioned to Scrivener, I don’t go back to Plottr. What I did in Plottr is, as far as I’m concerned, dead and buried.
Forward, always forward.
Plottr facilitates the first part of writing a story. It’s very visual and for the early planning, that works great.
Then, the writing of the text, the first draft, takes place in Scrivener. And as necessary, I will restructure and replan the story–which happens almost all the time–in Scrivener.
And I’ll stay in Scrivener for all of the edit and polish stages.
For a novel, the proportion of time spent in Plottr becomes miniscule, but that doesn’t belittle its contribution. Rather, it’s just that writing the first draft can take weeks, and then editing, rewriting, and re-editing will consume months. (Many successful novelists take six to twelve months to complete a novel.)
Plottr helps. Scrivener helps. But, as with reality shows on TV, it’s the editing that turns raw cabbage into …
What can you make with raw cabbage?